header

header

Monday, July 18, 2011

A visit to the berry patch

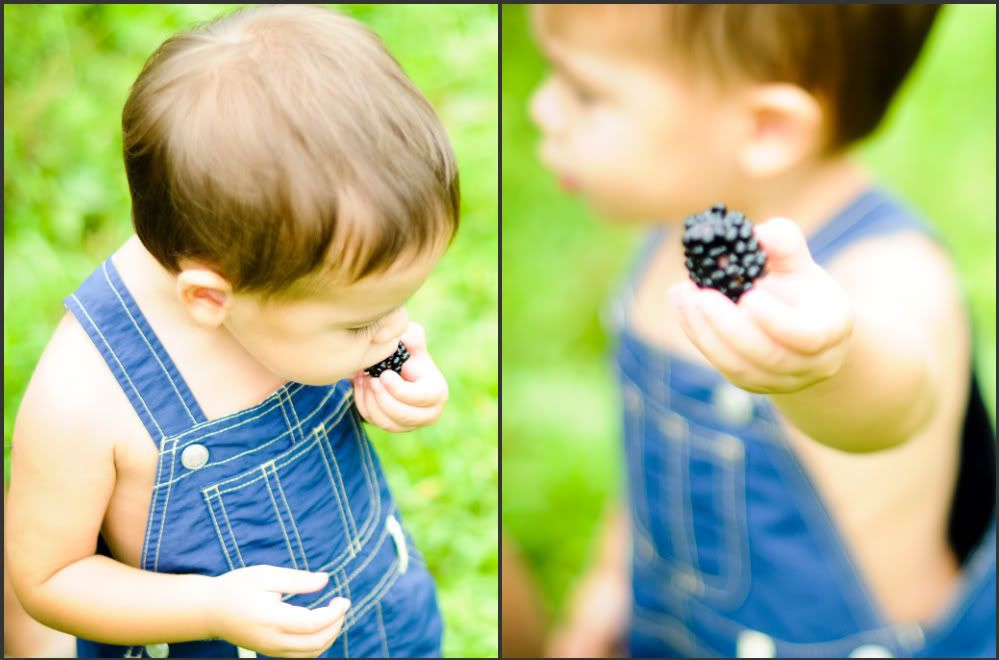
This weekend we decided to take Hayden to our local fruit and berry patch to pick some blackberries and peaches (he loves both.)  He was very excited to go get "black. berries" (he makes it onto two words ;) 

It was a great time.  Days like this I just step back and look at my precious little (growing) family and am SO thankful to be so wonderfully blessed.

"Grazing"

I was so bummed the focus was off on the pic to the right below.  I wanted that shot (focus was supposed to be on the blackberry) but I have a very busy two year old who was not interesting in being still for mommy to take photos!!!  I kept the photo anyways ;)
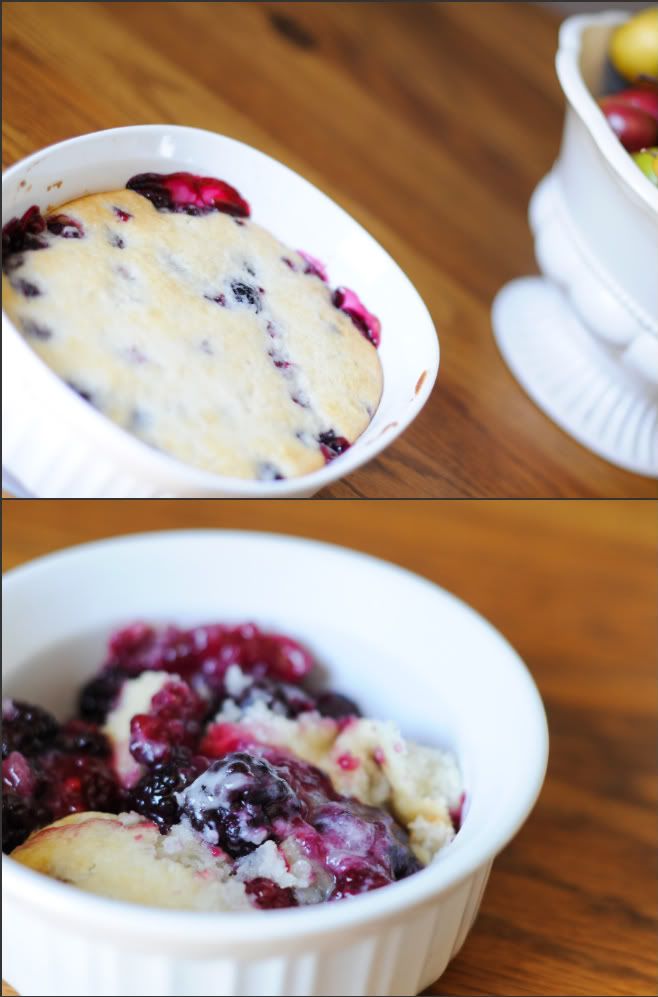
Oh soooo yummy!

With our yummy blackberries I wanted to make a cobbler.  I just made a quick and easy one with a store bought cobbler mix because well, this pregnant (and very fatigued) mommy is all about "easy" these days! :)


All photos taken by Kristen (blog author) unless otherwise stated. Do not copy/save or print without permission. Thank you!

Saturday, July 16, 2011

Pink or Blue???

Being the impatient person that I am, I wanted to try this little test...


I finally took the test this morning and...


Are


You


Ready???  ;)


It looks like Hayden may be getting a little brother!  Also looks like mommy better start coming up with some nursery ideas for a boy... ;) (maybe vintage airplanes??? The wheels are turning already...)

For those of you wondering, this test is proven to be 82% accurate for in-home usage (it was 90% accurate in lab tests.) 

  We do have a boy name picked out (though no middle name) and I would love another little boy but honestly, I just want a healthy baby.  Either sex would be welcomed with open arms into our little family!  I must admit, we kinda felt like this one was a girl but maybe we were wrong?  I guess we will have to wait a couple months to see what the ultrasound says!  I know our little boy would just love a brother :) 

Stay tuned to find out what our ultrasound says, I am hoping to have one as early as possible (because, again, I am SUPER impatient!!!)

To order one of these tests yourself, visit their website HERE.

Thanks Intelligender for a fun test! 

All photos taken by Kristen (blog author) unless otherwise stated. Do not copy/save or print without permission. Thank you!

Monday, July 11, 2011

Nursery Inspiration (yep....already!)

First off, I just want to apologize for being MIA for a while :-/  I have been majorly slacking on my blogging lately.  The truth is, this pregnancy is kicking my butt!  I have been completely exhausted (much more so than I remember being with Hayden) and I have been having a lot of nausea.  Basically, I haven't felt like doing much of anything lately including blogging, taking pics, cooking, etc.  And last week I was in Indiana visiting my family.  Thankfully, I have started to feel some better as far as the nausea goes (though I still struggle with it plenty) but I am still pretty tired most of the time.  I hope to be back to my old self and posting new, fun things very soon!  Today, I thought I would share with you all some of my nursery inspiration for the new baby...

So, since I am the most impatient person on the planet, I have already been planning in my head some nursery ideas.  Well, kinda...mostly all the ideas are for a girls room...I am fresh out of ideas for a boy nursery.  It was all I could do to come up with something boyish and yet non-cheesy for Hayden's room.

For his big boy room we are going with a nautical style, so that idea is out for a boy nursery. 
*sigh*  If this baby is a boy, I will need to do some serious inspiration-seeking online because I. got. nothin.
BUT...if it's a girl, I have a few ideas up my sleeve for a beautiful room fit for a little princess :)

First, I am absolutely in love with this iron crib.  It's definitely pricey but I am planning to sell Hayden's crib and dresser/hutch combo if we are having a girl so that money will be a big chunk of the cost.  (I will sell a kidney to come up with the rest if I have to....)  *wink*  Or, I may just be completely dreaming here but a girl can dream, right?

(source: Pottery Barn Kids.)

I guess I should say that while I am all about being thrifty with decorating our home, I tend to get carried away when it comes to nurseries.  I can't help myself.  Of course, when we did Hayden's room I was still working and had much more spending money for that kind of thing.  I will have to be a little more creative in how I fund the decor for the new baby room :)
Anyway, back on the subject...   Another thing that I would love to do is this paneled wall that Decor Chick did in her boy's room.

(source: Decor Chick.com)

  I think it would be perfect for the wall that the crib is on and maybe painted a pale pink so that the white crib will stand out some.  I think it would add a lot of character to the room!

Also, I would like to hang a small chandelier, like this one.

(source: moreluxuries.com)

Or this...

(source: Pottery Barn Kids)


I would actually love to find an antique that I can re-furb but the ones that I have seen so far cost just as much (if not more) than a new one and I would have to work hard at getting it cleaned up and painted. 

As far as furniture, my plans are to get an old dresser and paint it white.  I will probably add glass knobs.  Something I saw while antiquing with my mom gave me an idea...

LOVE!

Of course, I would do a different color (probably white) but I like the idea of an amoire.  If I could find a good deal on an old one, I could paint it, add new hardware and some fabric or lace to the doors.  I'm not sure if I'm 100% sold on the chicken wire yet...(I don't know if you can tell by the photo but it has chicken wire over the fabric on the doors.)  It's an interesting touch, just not sure if its cute for a nursery.  Anyway, I like the amoire idea.  I decided that I probably won't do a changing table in this nursery since I didn't use Hayden's much.  I just think they are a bit of a waste of space/money.  Of course if I do a regular dresser, I could use the top of it as a changing table if I wanted to. 

As far as bedding, I haven't looked into any of that yet.  I love the ruffle skirt from PBK in the crib photo but I don't know what I will do for bedding yet.  I will stick with something simple.  I love the idea of doing toile, I had thought of that when I was pregnant with Hayden so I may do that.  Also, I think I may skip the quilt this time.  Of course you're not supposed to use a blanket or anything with an infant so basically they are for looks which is exactly what Hayden's was used for.  It hung over the side of his crib as decoration for almost 2 years until we converted his bed to a toddler bed.  I used it as a blanket on his toddler bed but we are getting ready to get him a big boy bed and he has new bedding for that.  I paid almost $100 just for his quilt and it was barely used.  I don't think I will get one for this next one. 
Well, enough daydreaming for today :)  Can you tell I'm excited that I have another room to decorate?  (Not that I need another room to decorate since I have Hayden's room to re-do and I have big plans to re-decorate the living room (including a DIY project that I have been wanting to do for. EVER.)  But nevertheless, I'm excited to get started!

All photos taken by Kristen (blog author) unless otherwise stated. Do not copy/save or print without permission. Thank you!
Friday, June 17, 2011

Plate Hanging (How-To)

First, I would like to say a big "thank you!" for a the comments, "pins" and features on our new banquette seating!  We are excited that you all like it, it helps make all the hard work worth it :)  I tried to reply to the comments, but for some reason, blogger keeps signing me out and taking me to the sign-in screen every time!  Very frustrating! :-/  Anyway, since I couldn't comment, I wanted to share that really quick :)
I wanted to give a quick tutorial on hanging plates on the wall.  There are a few ways of doing it.  Last time I hung plates in our dining room, I used these brackets...


Not only are these a giant pain to get on the plate, I don't think they look very good.  I don't like the fact that you can see the prongs.

I wanted to figure out a way that I could hang them without anything showing.  I wanted to hang them just like a picture frame.  I decided I could use picture wire but I needed a strong adhesive to attach it to the ceramic plate.  It briefly crossed my mind to use hot glue, but I knew I needed something strong (I didn't want these plates crashing to the ground!)  So, I decided to use Epoxy adhesive.  (I later learned about the disk adhesive plate hangers, but they are a couple bucks each and since I was hanging several plates, the Epoxy was much more cost effective.)
I knew the Epoxy would be a good, strong adhesive that would stick well to the ceramic.  I couldn't find my picture wire so I decided to use some craft cord (you could use ribbon, picture wire would probably work well.)  The cords were actually a bit of a pain since they sort of had a mind of their own...
Anyway, I mixed up the Epoxy adhesive per instructions on the packaging.  I wore a mask since I am pregnant and this stuff puts off some fumes.  You would want the area you are working in to be well ventilated.  Also, I recommend using gloves because you don't want to get this stuff on your skin. 
I dabbed the Epoxy on the back of the plate and attached the cord like this:

It's hard to see where the adhesive is since it is clear but you need a dab on each end and then I made sure the cord was covered on the top just to make sure it wouldn't pull out.  You will want to place the cord/ribbon/wire right on that 'edge' so the plate will hang flat against the wall.
Let the adhesive set per instructions, I think mine said it was cured after an hour.

For hanging the plates, I would highly recommend using a template!  It makes hanging the plates so fast and easy.  It took me no more than 5 minutes start to finish to hang the plates using my template and I did not have to pull out any nails or re-position any plates!
Your template does not need to be perfect, just make sure the dimensions are correct.

Place your papers where you think you want the plates and step back to look.  Move them as needed till you have the perfect placement.
Then, just place a nail where each paper is hung, then remove the paper and hang your plate!


Yay, no ugly prongs sticking out! 


By the way, all my plates came from thrift stores and the dollar store and I paid no more than $1 each.  The Epoxy was just under $4 so for just over $10, I have awesome decor for our newly decorated space! 

All photos taken by Kristen (blog author) unless otherwise stated. Do not copy/save or print without permission. Thank you!

Tuesday, June 14, 2011

Pregnancy...the Second Time Around.

It seems so long ago since I was pregnant with my first baby, although it was just a little over 2 years ago.  Things are so much different this time around.  I'm already a mommy.  I've "been there done that" as far as pregnancy and delivery goes.  Strangely, all that doesn't prevent nervous feelings, questions and worries from entering my mind just like they did the first time I was pregnant.  Some are different worries, like how will I love another child like I love my firstborn?  and some are the same worries and concerns I had with my first pregnancy like what if something goes wrong? 
I'm pretty much what you would call a "worry wart" and have also been known to have some hypochondriac tendencies.  Example:  Years ago, I had a dull, recurring pain in my side and I convinced myself if was cancer (go ahead, laugh it up...)  Even with my first pregnancy, I experienced ligament pain early on and was sure I had an ectopic pregnancy.  Obviously I didn't since I have a beautiful 2 year old boy but that's just an example of how I can let my thoughts run wild and play tricks on me.  I am really trying to be better this time and not read, research and worry so much. 
But besides the fears about the health of my baby and the pregnancy, I think about how a new baby will change our family.  I don't want Hayden to feel left out.  I want him to feel just as special and loved.  He has been the center of our world for two years and soon he will be sharing us with a sibling.  And then there's the new baby...  It's so hard for me to imagine loving another child like I love Hayden.  I know it will happen naturally just like it did with Hayden, but it's still something I worry about.   
And there is of course the question boy or girl?  I can honestly say, I will be perfectly happy with either one!  I would love another boy and I would love a little girl.  Whichever God chooses to bless our family with is fine with me!  I already can't wait to find out.  The suspense is killing me as it did with Hayden.  It seemed like an eternity till we were able to find out the sex when I was pregnant with him.  I'll be honest, I don't know how people who choose not to find out the sex do it, I'm just not that patient! 
This new pregnancy brings lots of questions and uncertainties but also the hope of new life.  New life that will bring untold joy and happiness to our family.  I'm excited for us to take this journey together, the second time around. :)


All photos taken by Kristen (blog author) unless otherwise stated. Do not copy/save or print without permission. Thank you!
Thursday, June 9, 2011

Our New Banquette Seating!

Our dining room transformation is finally complete!  Since it has become apparent that moving is not really in our near future, I am working on ways to make this house work better for us.  I decided that I wanted to sell our square dining table, get a round one and build banquette seating in the corner.  Our dining area is small and I thought this configuration would work much better in the space (and look cute, too!)  I was tired of the dark, heavy color scheme I had as well so I planned to really brighten it up with the new decor!  I sold our table for $200 and planned for that to cover most of the cost of the banquette project (wishful thinking...)  Anyway, my awesome hubby beautifully built the banquette himself.  His experience working in a cabinet shop definitely came in handy for this DIY project!  I hope to eventually post a how-to about building it, although I may have to let Jeff write it since he was the builder ;)  Anyway, here is a before and after of what our dining room looks like.  It now has more of a 'breakfast room' feel to it but I wanted something more casual so it works perfect.  We don't really have a need for a 'formal' dining space right now, maybe in the next house.   So anyway, here goes!

Before: (I keep asking myself what was I thinking? with all the dark colors!)


AFTER!


The table is a craigslist find that is exactly what I wanted!  (The chair is from our former kitchen table that we had when we rented.)
Be watching for a little tutorial on the quick & easy way I hung these plates!

These Ralph Lauren pillows were a bit of a splurge but I used hard earned cash I made from 2nd shooting a wedding! ;)  To me, it was worth it.  I looooooove them and if I would have gotten cheap pillows, it would have looked chincy.  I wanted good, feather pillows and these are nice and durable which is important for this space since people will be sitting against/on them!

My hubby did such a great job on building the banquette!!  I will show more details later but they open up and have storage inside (which I desperately need!)  I made the cushions.  They aren't perfect but they will do!

Just for fun, a few more after pics (of the. same. thing.) 

I'm not really thrilled with how our chandelier looks in the space now, but I will leave it for now.  Maybe I will find a great deal on one sometime in the future.


I LOVE it!  The space is so much brighter and more casual. 


p.s. I am linking up!


Thrifty Decor Chick's Before and After party!


HookingupwithHoH

Somewhat Simple


Inspiration Friday at At The Picket Fence


Funky Junk's Saturday Nite Special


All photos taken by Kristen (blog author) unless otherwise stated. Do not copy/save or print without permission. Thank you!

Tuesday, June 7, 2011

How I Told Him...

Well, if you're my 'friend' on Facebook, I'm sure you already know the news...We're expecting baby #2!  I was hoping to conceive last month for a few reasons, one of them being so that I would be able to surprise my hubby with the news on our 6th wedding anniversary.  I tested last Thursday (and got a positive!) but kept the news from Jeff until Saturday night when we went to dinner for our anniversary.  It was not easy keeping it a secret since I tell him literally everything but I really, really wanted to surprise him so I made myself keep quiet.   

Finally, I was able to give him my special gift!  We went to Ruth's Chris steakhouse for dinner and after we ordered, Jeff asked if I wanted to exchange cards.  Yes, of course!!! Mine first, mine first! I thought, but I acted cool ;)  We read our cards to each other and I handed him a jewelry box.  (We had agreed to not get each other gifts this year and that we would just go to a nice dinner.)  Jeff immediately felt guilty for not having a gift for me once he saw the box.  I assured him that it wasn't a big deal and encouraged him to open the box!  HE kept saying how bad he felt, I know he thought I got him a watch or something.  It was funny.  Anyway, I finally convinced him to open the box...


As he was opening the box, I started recording with my video camera.  I'm so glad I recorded his reaction.  I love the look on his face when he saw what was inside the box.  Priceless.  I tried to upload said video to this post, but I was having issues.  :(

What a great wedding anniversary!  I'm so thankful for the six years of marriage that God has blessed us with so far and I am especially thankful for the blessing of our growing family! 

All photos taken by Kristen (blog author) unless otherwise stated. Do not copy/save or print without permission. Thank you!