Showing posts with label gettin' crafty. Show all posts

Tuesday, January 10, 2012

DIY Wooden Nursery Blocks

When I was pregnant with Hayden and decorating his nursery, I ordered some cute little handmade custom blocks from Etsy.  Well, this time around I am not working and don't have the extra funds to spend almost $30 on 6 little blocks!  I decided to make my own and I did with a $5 piece of wood, Mod Podge and 1/2 off scrapbook paper from Hob Lob :)  They are not perfect, but that's ok.  I wanted them to look a little 'rustic' or 'shabby' whatever you want to call it.

Here's how I made them.  We got a 1.5 in x 1.5 in piece of wood.  I wanted 2 inch blocks but they only had this size and one that was too big.  Anyway, my wonderful hubby cut 10 1.5 inch blocks from the wood.  I couldn't have done it without him since that part required some chop saw action!  Let me just say I couldn't do a LOT of my projects without my hubby's help, he is the best :)

So, I then had the daunting task of sanding all these because I wanted to round out the edges a bit.  This probably would have been easier with a sanding block but I had like a sanding sponge type thing that was not really cutting it :-/  Anyway, after I got all the rough edges smoothed out, I went around them with a wood stain pen and 'stained' all the edges.

It doesn't have to be perfect, just enough to cover what will show in-between the pieces of paper.
I had pre-cut all my pieces of scrapbook paper to fit and had them separated. 
Then I just Mod Podged them onto the blocks one at a time. (I used matte finish because I didn't want a shiny finish.)
I put the mod podge on the block then laid the paper on top but you could coat the back of the paper and put it on the block, I just wanted to get the least amount of sticky glue on my fingers as possible.....  I think either way you get messy :p
After covering the blocks in paper, I covered each block with a coat of mod podge.
I covered the 5 sides at one time and left one side (the bottom) uncoated until they dried, then finished coating them.

Here's the finished product :)

I love this little ducky block :)
They can be changed to whatever pattern combo I like.  I put the same 6 patterns on each block so if I want, I can have all the blocks matching or mix it up!
They are now sitting atop her dresser.  You'll be seeing them again in the nursery reveal hopefully coming soon!  I am still finishing up decorating in there.  I have yet to find an affordable accent rug (that coordinates with the room) and I'm getting a little frustrated!  I can't wait to show it to you all :)  My hubby worked so hard in there!

All photos taken by Kristen (blog author) unless otherwise stated. Do not copy/save or print without permission. Thank you!

Tuesday, January 3, 2012

Old Window Turned Vintage Mirror

Ever since I got that old window you have been seeing on my mantel lately, I have envisioned turning it into an antique looking mirror for Ava's vintage inspired nursery.  Well, today I did just that!  It was a pretty easy project and I am happy with the outcome!  Can't wait to hang it in her nursery.

This is what I started off with.  My $10 vintage window.

Here's how I transformed the glass panels into old looking mirrors. 
First, I got me a can of this stuff :)
This stuff isn't cheap ($11.99 for a 6oz can) but I used a 40% off coupon at Hobby Lobby so that made it just over $7. 

I found this tutorial on how to apply and 'distress' the mirror finish.
I applied several thin coats of the paint to the back of the window. 
It's pretty easy to apply and dries quickly.  It's also pretty forgiving if you don't apply it perfectly evenly :)

At this point it was looking like a mirror!  I could have just left it like this and it would have been a cute mirror but since her room has a vintagey feel to it, I wanted to add some age to it :)

I started 'distressing' the mirror finish by following instructions found here.
It said to use a 50/50 water/vinegar mixture to spray on the paint and rub some of it off.  I use a homemade water vinegar solution to clean my countertops with (though its not 50/50) so I used that. 
 I would suggest working a small area at a time but I sprayed the whole thing and went back with a cloth and removed bits of the paint.

I just tried to keep it random but there was some that came off a little more than what I wanted!  It was ok though.
I got some of this stuff to apply to the spots where I scraped off the mirror finish to give it more of an antique look.
It's a gold leaf type finish.  I got a bronze color because I didn't want it to look yellow.  The package says to brush it on but I think it worked better to dab it on with a sponge.  I covered all the bare spots and let it dry. 
The finished product :)
Looks like a vintage mirror to me!
I can't wait to hang it above her dresser in the nursery!

P.S. Happy New Year everyone!  I hope you all have a wonderful year!

(I am linking up to Thrifty Decor Chick's Before & After Party!)


All photos taken by Kristen (blog author) unless otherwise stated. Do not copy/save or print without permission. Thank you!

Thursday, March 31, 2011

DIY *No sew* camera strap cover tutorial

So, I've been wanting a cute little camera strap cover for my new camera but I didn't really want to spend $20-$25 on one so I decided to make one myself!  Only I don't have a sewing machine so it had to be 'no sew.'  :)
This is such an easy project that I'm sure I do not even need to give a 'tutorial' but I'm gonna just for fun and because I haven't done one in a while!

I got some of this...

Then I measured the length of the wide part of my camera strap and 'hemmed' both sides (left and right) of my material with the heat n bond.

(please ignore my gross looking ironing board and crappy instructional photos...)

Then I hemmed the bottom of the material so that I would have a finished edge. 
I folded the material over the width of the strap and added another strip of heat n bond to the seam and cured it with the iron. Easy as pie!

I added a little flower I made from ribbon and it was finished!  I love how it adds a little personality to my camera ;)
I had fun making this during Hayden's nap time today, it had been too long since I had done some crafting!


**Update**
I love that this post has been so popular and pinned so many times on Pinterest but PLEASE respect my work and don't sell my design.  I did this tutorial so that people could make a cute strap cover for themselves, not so others could profit from my idea ;)  Thank you for understanding!!
If you would like to purchase one of these strap covers, they are now available in my Etsy shop HERE for just $10.25!

p.s. I'm linking up!


giveaways


All photos taken by Kristen (blog author) unless otherwise stated. Do not copy/save or print without permission. Thank you!

Thursday, January 13, 2011

PB inspired 'trash to treasure.'

I love getting my Pottery Barn catalog in the mail.  It makes me happy to thumb through the pages and see all the beautiful home decor.  I don't usually purchase things from them since their prices are not really in my SAHM budget ;)  But, I love getting ideas from them!  There are lots of things in there that you can easily re-create/make yourself.  Like, for example, these book bundles they are selling...
A mere $39 for a bundle of four old books with the covers ripped off and tied together with string.  I wonder how many of these they are actually selling since it seems pretty easy to find some old books and make these yourself! 
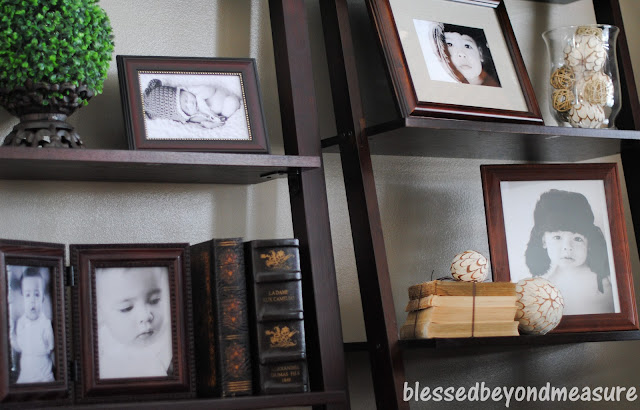
Anyway, I thought these would look great on my ladder shelf but obviously I wasn't going to purchase these from PB  ;)   I found 4 old hardcover books at a thrift store.
 I paid $1 each and if it were 'yard sale season' I'm sure I could have found some old paperbacks for a quarter.  Anyway, I didn't have any hemp string either so I had to buy that too.  I spent about $6 total on supplies but if you already have old books, you could make this for practically free!
Here is my little version.  I decided to use darker string to go better with my living room decor. 
I think it makes a nice addition to my shelves ;)
Decorchick! also did a version of a book bundle she saw in the Ballard Designs catalog.  I think Ballard is charging around $25 for their bundles.  Either way, I did mine for a very small percentage of what they are selling these things for!  I don't think my hubby would be too happy if I told him I spent $40 on some old books with the covers ripped off  ;)
p.s. I am not trying to imply that books are 'trash' by the title of this post.  I love books and think that they are important!  I just think this is a great way to re-purpose unwanted old books from a thrift store.  :)
Happy Decorating!

P.S. I'm linking up!


Photobucket

Tuesday, November 30, 2010

Budget Friendly Christmas Decor :)

So, this year I am trying to keep my spending on Christmas decor to a minimum so I will have more to spend on my favorite little boy.  :)  I used mostly what I already had but wanted to do a couple different things this year.  Like with my set of candle holders that I got a few years ago.  They came with these hideous white ball candles.
Lovely, aren't they?  I don't know why it never occured to me to get something different...
But this year, I decided I wanted some faux cranberries (or any red berries) instead of the ugly candles.  Well, the faux cranberries were not easy to find and I was getting impatient (as usual.)  So, I decided to go with real cranberries.  I'm not sure if they will last until Christmas but they seem to be holding up ok so far.  And at $2 a bag, I can afford to change them out if I need to.  I'm glad I decided to go with the real ones since faux cranberries probably would not have been cheap.  I love how much better these look now  :)
Best $2 I ever spent  :)  Well...maybe.  haha!
Ok, so that brings me to budget-friendly item #2!
I loved the wreath on my chandelier for fall so much that I wanted to do one for Christmas, too.  I had planned on buying a small, artificial wreath for it, but...today I had an idea when I was looking outside at the rain.  :)  We have Cypress trees at the back of our property that the builders planted when they built the house.  They have grown quite big and I saw them towering above my fence and thought, I could totally cut some branches off those and make my own little wreath.  So, I put my rainboots & hoodie on, grabbed some scissors (couldn't find the pruning shears) and went out back to cut me some greenery! 

I fashioned a little wreath out of some branches & wire and added it to my chandelier.  I piled on more greenery till I thought it looked ok, but it needed some color so I got out the ol' glue gun & added some of my leftover cranberries :) 
Me likey  :) 
The best part about this wreath is that it was FREE!  yay  :p
And...just for kicks...here are a couple pics I took of my little cutie yesterday.  He was being an angel and actually cooperated while I took his photos!  I was overjoyed! 
(He was showing me his 'ear.')

p.s. I'm linking up to...


http://www.thethriftyhome.com