Thursday, July 28, 2011

Cloth Diapering 101


Since I started using cloth diapers for my son when he was a couple months old, I have had several friends ask me for information about cloth diapering.  Recently I decided that it might be a good idea to do a post about it so that I would always have it handy to link people to if they asked for information.  This will not be a complete guide to cloth diapering by any means, but I do hope that it will help those who don't know anything about it and want to become more familiar with the basics!  So, I will give a basic overview of modern day cloth diapering and my experience with it.
First off, let me just say that I personally love cloth diapering!  Of course it is a bit more work than using disposables but it's really no big deal once you get the hang of it! 
Ok, I am going to list a few reasons why I chose to cloth diaper:


1) Cost.  Obviously, it is much more cost effective to use cloth.  I have read that you can save up to $2,000 by using cloth diapers for two years.  Of course, this is dependent on variables like what type of cloth diapers you use, etc...  But, you have to admit that is a huge savings!  And with us being on one income, I am always looking for ways to save.  This was a no-brainer!

2) It's "green!"  If your kid goes through 6,000 disposable diapers before it's potty trained, that is a lot of diapers ending up in a landfill for hundreds of years!  I like the idea of saving waste by using cloth.

3) Health.  Disposable diapers are made with chemicals.  I'm not going to get on a soapbox or get into stats (it's easy to look this stuff up on your own) but there is research that these chemicals are not the safest for babies.  Of course I don't think anyone who uses disposables is bad for doing so, I do use and have used them on Hayden.  He wears disposables at night for bedtime.  I just like the idea of keeping him in them as little as possible.   


Now that we have established a few good reasons for using cloth (other than the fac that they are super cute and fun) I will explain a bit more about them.  There are four main different types of cloth diapers on the market right now.  They have come a long way from the ones our mothers and grandmothers used! 

1)  Old Fashioned flat diapers (a.k.a. prefolds.)  This is probably what you think of when you hear "cloth diaper." 

This is the most affordable cloth diapering option.  They are used with pins or this fastener called a snappi.  Snappis are much more convenient than the pins.
Prefolds need to be covered with a waterproof diaper cover to prevent leaks.  There are several brands of covers such as Thirsties, Bummis, etc...  I love Thirsties covers and have never had leaks using them!

2)  Fitted diapers  Fitteds are contoured and fasten with snaps or velcro and they also, like prefolds, require a cover to prevent leaks.  A popular fitted diaper brand is "Kissaluvs."

3)  All-In-One (AIO)  The AIO cloth diaper is a diaper and cover in one. 

The AIO goes on just like a regular diaper.  They fasten with either snaps or velcro and are very easy to use.  They are the priciest of cloth diapers at just under $20 a piece for a one-size.  A popular (and my favorite) brand of AIO's is BumGenius.  The best thing about AIO's is convenience.  No covers to mess with or inserts to 'stuff.'  Just grab the diaper and go! 

4)  Pocket Diapers  Very similar to an AIO in that when you put the diaper on, it is one piece but the pocket diapers have removable inserts.  The removable inserts make washing easier, drying faster and you can also easily add more inserts to increase absorbency.  These are my favorite diapers.  I think they also come cleaner than the AIO's that don't have removable inserts.  I also love that you can add inserts if you need more absorbency.  BumGenius also makes a great pocket diaper. 

If you have never tried cloth diapering before, I would suggest trying all 4 kinds of diapers before deciding on which kind to purchase a "stash" (stock pile of diapers) of.  You may be surprised at what kind you like best and it's just a waste if you buy several of one kind and end up not liking it.  There are pros and cons to each kind so do some research and 'test drive' a few before purchasing several.  There are some shops that rent kits of several types of cloth diapers so that people can try them without a large financial commitment.  This is a great idea and I would recommend it to anyone new to cloth diapering. 

Where to buy:

Most larger cities should have local natural baby or cloth diapering shops.  These are great because they usually offer classes and you can stop in for advise/ideas on what products to buy.  Do a google or white pages search for a shop in your area!  There are also places like Diaper Swappers where you can buy used diapers at great prices.   Also, websites like Cottonbabies  that offer free shipping and have 'seconds' sales where you can get slightly imperfect diapers at greatly reduced prices!  Sometimes, you can't even tell what the 'flaw' in the diaper is.  It's a great way to get the more expensive diapers at a cheaper price. 

Washing

There are many webistes offering instructions on washing your cloth diapers and they vary slightly.  Here is what has worked for me:  Wash hot using about 1/2 the usual amount of detergent and 2 rinse cycles.  Detergent can build up in cloth diapers and cause an ammonia smell.  To avoid this, it's best to use 1/2 the usual amount for whatever size load you are washing and do two rinse cycles.  Some people choose to wash one cycle cold with soap and one hot cycle without as well as 2 rinse cycles.  If you do end up with a build up of detergent in your diapers (they will have a strong ammonia odor if the child pees in the diaper) then you can 'strip' the diapers by washing them with no soap in the hottest water possible (set your water heater to the hottest setting but be SURE to change it back) for several cycles until you no longer see soap suds in the water during the wash.  Do NOT use bleach on your cloth diapers especially the AIO's, pocket diapers or covers as it will eat away at the laminate coating that prevents leaks.  Even with prefolds, it's best not to use bleach because your baby is exposed to those chemicals.  If you promptly rinse your diapers and wash on hot you shouldn't have a problem with staining.  If you do get stains, sunning them outside is a great (and chemical free) way to rid your diapers of stains.  Also, you do not want to use the "Free and Clear" detergent for the covers or AIO's with the laminate coating.  I personally like Tide detergent for diapers.  I love the smell and it cleans well.  They also make detergent specifically for cloth diapers.  One brand is Rock in Green.  I have never used it but would love to try it.  
As far as drying, you can dry prefolds and inserts in the dryer but it's recommended to not put Thirsties covers, or BumGenius pockets in the dryer because it can break down the laminate coating over time.  I like to hang my diapers on a clothesline (weather permitting.)  They dry quick and smell great :)   

Well, there you have it.  A crash course in basic cloth diapering.  I hope this was helpful for anyone curious about cloth diapering.  And if you are a seasoned cloth diapering mama and would like to share advise, maybe something that I didn't cover, feel free to comment below! 

Happy Diapering!


All photos taken by Kristen (blog author) unless otherwise stated. Do not copy/save or print without permission. Thank you!

Friday, July 22, 2011

Lemon Raspberry Cupcakes

I had a lemon cake mix from my mom and decided to make some lemon raspberry cupcakes...


I spent much of the afternoon creating these little treats from an idea that popped into my head... ;)


What you will need:


*Lemon Cake Mix and ingredients listed on back of the box

*(2) 6oz. containers of raspberries (one for the cake and one for garnish.)

Make the cake according to box instructions and while blending it with an electric mixer, add 6 oz of fresh raspberries.
Bake per instructions on back of the box.

Homemade Lemon Cream Cheese Frosting

*(2) sticks of real butter.  It's important that you use real butter for best results.

*Powdered sugar (3 cups or so)

*One package of cream cheese

*Zest of one lemon

Soften butter by letting it sit at room temp while you make the cake.  Take butter and add a cup or two at a time of powdered sugar while mixing with electric mixer until prefered consistency (slightly firm.)  I just kept adding sugar so I didn't measure exactly but you will know when you have it like you want it.  Then, add cream cheese.  I added the whole package but if you want a lighter cream cheese flavor, add half.  Keep blending and add lemon zest.  Blend until flavors are mixed well and you're ready to frost!  Garnish cupcakes with raspberries.


I like to use my Wilton dessert decorator to frost my cupcakes and the homemade frosting works best for this because it is stiffer and holds its shape more (or it should...I only had a stick and a half of butter today and mine was a little too sugary I think so it wasn't holding it's shape like I wanted....oh well.) 

P.S.  I just came up with this as a fun variation on the lemon cake but if I had to do it over again, I would maybe add some raspberry extract to my cake just to give it a little more of that berry flavor!  I might even add a tad more fruit ;)  I was pretty pleased with how the lemon zest flavored the frosting so I will do that again!
Also, one reason why I chose to add fresh fruit instead of just the extract was to give the cake a nice, moist texture.  There is nothing worse than a dry cupcake (well...maybe that's an exaggeration but you get my point.)  One trick I like to use when making cupcakes is I add one cup of prepared pudding to the batter before baking.  It makes a heavier cupcake but they are SO moist and delicious! I didn't add pudding this time because I was adding the fruit, but it is a great way to get super moist cupcakes! (I just buy a box of pudding mix and prepare it before the cake mix, let it chill in the fridge while I make the cake batter, then I add it before baking!)

Happy Baking!


p.s. I'm linking up!


All photos taken by Kristen (blog author) unless otherwise stated. Do not copy/save or print without permission. Thank you!

Monday, July 18, 2011

A visit to the berry patch

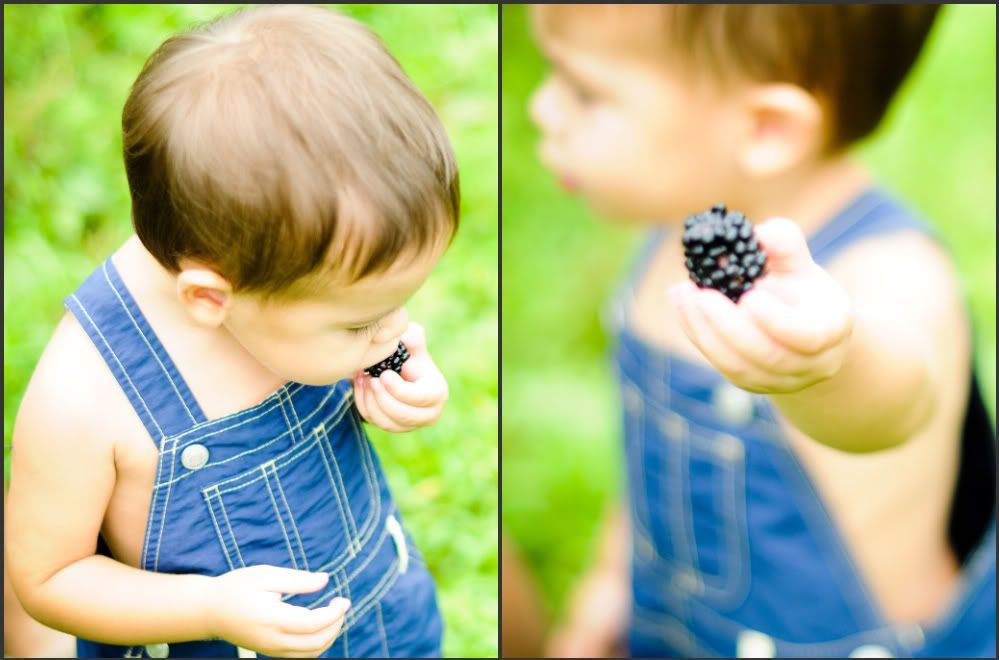
This weekend we decided to take Hayden to our local fruit and berry patch to pick some blackberries and peaches (he loves both.)  He was very excited to go get "black. berries" (he makes it onto two words ;) 

It was a great time.  Days like this I just step back and look at my precious little (growing) family and am SO thankful to be so wonderfully blessed.

"Grazing"

I was so bummed the focus was off on the pic to the right below.  I wanted that shot (focus was supposed to be on the blackberry) but I have a very busy two year old who was not interesting in being still for mommy to take photos!!!  I kept the photo anyways ;)
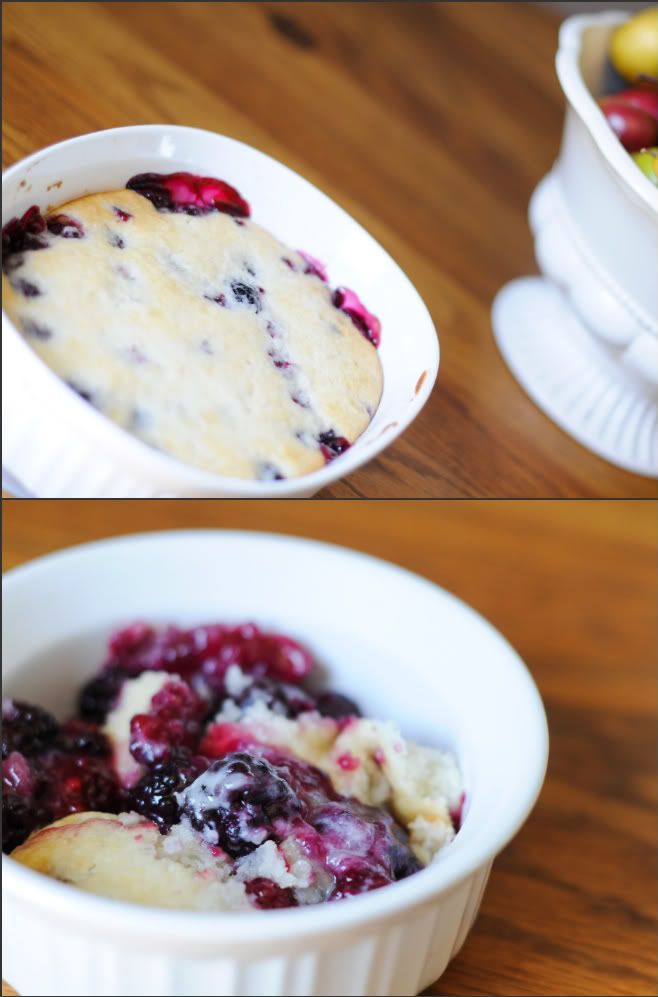
Oh soooo yummy!

With our yummy blackberries I wanted to make a cobbler.  I just made a quick and easy one with a store bought cobbler mix because well, this pregnant (and very fatigued) mommy is all about "easy" these days! :)


All photos taken by Kristen (blog author) unless otherwise stated. Do not copy/save or print without permission. Thank you!

Saturday, July 16, 2011

Pink or Blue???

Being the impatient person that I am, I wanted to try this little test...


I finally took the test this morning and...


Are


You


Ready???  ;)


It looks like Hayden may be getting a little brother!  Also looks like mommy better start coming up with some nursery ideas for a boy... ;) (maybe vintage airplanes??? The wheels are turning already...)

For those of you wondering, this test is proven to be 82% accurate for in-home usage (it was 90% accurate in lab tests.) 

  We do have a boy name picked out (though no middle name) and I would love another little boy but honestly, I just want a healthy baby.  Either sex would be welcomed with open arms into our little family!  I must admit, we kinda felt like this one was a girl but maybe we were wrong?  I guess we will have to wait a couple months to see what the ultrasound says!  I know our little boy would just love a brother :) 

Stay tuned to find out what our ultrasound says, I am hoping to have one as early as possible (because, again, I am SUPER impatient!!!)

To order one of these tests yourself, visit their website HERE.

Thanks Intelligender for a fun test! 

All photos taken by Kristen (blog author) unless otherwise stated. Do not copy/save or print without permission. Thank you!

Monday, July 11, 2011

Nursery Inspiration (yep....already!)

First off, I just want to apologize for being MIA for a while :-/  I have been majorly slacking on my blogging lately.  The truth is, this pregnancy is kicking my butt!  I have been completely exhausted (much more so than I remember being with Hayden) and I have been having a lot of nausea.  Basically, I haven't felt like doing much of anything lately including blogging, taking pics, cooking, etc.  And last week I was in Indiana visiting my family.  Thankfully, I have started to feel some better as far as the nausea goes (though I still struggle with it plenty) but I am still pretty tired most of the time.  I hope to be back to my old self and posting new, fun things very soon!  Today, I thought I would share with you all some of my nursery inspiration for the new baby...

So, since I am the most impatient person on the planet, I have already been planning in my head some nursery ideas.  Well, kinda...mostly all the ideas are for a girls room...I am fresh out of ideas for a boy nursery.  It was all I could do to come up with something boyish and yet non-cheesy for Hayden's room.

For his big boy room we are going with a nautical style, so that idea is out for a boy nursery. 
*sigh*  If this baby is a boy, I will need to do some serious inspiration-seeking online because I. got. nothin.
BUT...if it's a girl, I have a few ideas up my sleeve for a beautiful room fit for a little princess :)

First, I am absolutely in love with this iron crib.  It's definitely pricey but I am planning to sell Hayden's crib and dresser/hutch combo if we are having a girl so that money will be a big chunk of the cost.  (I will sell a kidney to come up with the rest if I have to....)  *wink*  Or, I may just be completely dreaming here but a girl can dream, right?

(source: Pottery Barn Kids.)

I guess I should say that while I am all about being thrifty with decorating our home, I tend to get carried away when it comes to nurseries.  I can't help myself.  Of course, when we did Hayden's room I was still working and had much more spending money for that kind of thing.  I will have to be a little more creative in how I fund the decor for the new baby room :)
Anyway, back on the subject...   Another thing that I would love to do is this paneled wall that Decor Chick did in her boy's room.

(source: Decor Chick.com)

  I think it would be perfect for the wall that the crib is on and maybe painted a pale pink so that the white crib will stand out some.  I think it would add a lot of character to the room!

Also, I would like to hang a small chandelier, like this one.

(source: moreluxuries.com)

Or this...

(source: Pottery Barn Kids)


I would actually love to find an antique that I can re-furb but the ones that I have seen so far cost just as much (if not more) than a new one and I would have to work hard at getting it cleaned up and painted. 

As far as furniture, my plans are to get an old dresser and paint it white.  I will probably add glass knobs.  Something I saw while antiquing with my mom gave me an idea...

LOVE!

Of course, I would do a different color (probably white) but I like the idea of an amoire.  If I could find a good deal on an old one, I could paint it, add new hardware and some fabric or lace to the doors.  I'm not sure if I'm 100% sold on the chicken wire yet...(I don't know if you can tell by the photo but it has chicken wire over the fabric on the doors.)  It's an interesting touch, just not sure if its cute for a nursery.  Anyway, I like the amoire idea.  I decided that I probably won't do a changing table in this nursery since I didn't use Hayden's much.  I just think they are a bit of a waste of space/money.  Of course if I do a regular dresser, I could use the top of it as a changing table if I wanted to. 

As far as bedding, I haven't looked into any of that yet.  I love the ruffle skirt from PBK in the crib photo but I don't know what I will do for bedding yet.  I will stick with something simple.  I love the idea of doing toile, I had thought of that when I was pregnant with Hayden so I may do that.  Also, I think I may skip the quilt this time.  Of course you're not supposed to use a blanket or anything with an infant so basically they are for looks which is exactly what Hayden's was used for.  It hung over the side of his crib as decoration for almost 2 years until we converted his bed to a toddler bed.  I used it as a blanket on his toddler bed but we are getting ready to get him a big boy bed and he has new bedding for that.  I paid almost $100 just for his quilt and it was barely used.  I don't think I will get one for this next one. 
Well, enough daydreaming for today :)  Can you tell I'm excited that I have another room to decorate?  (Not that I need another room to decorate since I have Hayden's room to re-do and I have big plans to re-decorate the living room (including a DIY project that I have been wanting to do for. EVER.)  But nevertheless, I'm excited to get started!

All photos taken by Kristen (blog author) unless otherwise stated. Do not copy/save or print without permission. Thank you!

Friday, June 17, 2011

Plate Hanging (How-To)

First, I would like to say a big "thank you!" for a the comments, "pins" and features on our new banquette seating!  We are excited that you all like it, it helps make all the hard work worth it :)  I tried to reply to the comments, but for some reason, blogger keeps signing me out and taking me to the sign-in screen every time!  Very frustrating! :-/  Anyway, since I couldn't comment, I wanted to share that really quick :)
I wanted to give a quick tutorial on hanging plates on the wall.  There are a few ways of doing it.  Last time I hung plates in our dining room, I used these brackets...


Not only are these a giant pain to get on the plate, I don't think they look very good.  I don't like the fact that you can see the prongs.

I wanted to figure out a way that I could hang them without anything showing.  I wanted to hang them just like a picture frame.  I decided I could use picture wire but I needed a strong adhesive to attach it to the ceramic plate.  It briefly crossed my mind to use hot glue, but I knew I needed something strong (I didn't want these plates crashing to the ground!)  So, I decided to use Epoxy adhesive.  (I later learned about the disk adhesive plate hangers, but they are a couple bucks each and since I was hanging several plates, the Epoxy was much more cost effective.)
I knew the Epoxy would be a good, strong adhesive that would stick well to the ceramic.  I couldn't find my picture wire so I decided to use some craft cord (you could use ribbon, picture wire would probably work well.)  The cords were actually a bit of a pain since they sort of had a mind of their own...
Anyway, I mixed up the Epoxy adhesive per instructions on the packaging.  I wore a mask since I am pregnant and this stuff puts off some fumes.  You would want the area you are working in to be well ventilated.  Also, I recommend using gloves because you don't want to get this stuff on your skin. 
I dabbed the Epoxy on the back of the plate and attached the cord like this:

It's hard to see where the adhesive is since it is clear but you need a dab on each end and then I made sure the cord was covered on the top just to make sure it wouldn't pull out.  You will want to place the cord/ribbon/wire right on that 'edge' so the plate will hang flat against the wall.
Let the adhesive set per instructions, I think mine said it was cured after an hour.

For hanging the plates, I would highly recommend using a template!  It makes hanging the plates so fast and easy.  It took me no more than 5 minutes start to finish to hang the plates using my template and I did not have to pull out any nails or re-position any plates!
Your template does not need to be perfect, just make sure the dimensions are correct.

Place your papers where you think you want the plates and step back to look.  Move them as needed till you have the perfect placement.
Then, just place a nail where each paper is hung, then remove the paper and hang your plate!


Yay, no ugly prongs sticking out! 


By the way, all my plates came from thrift stores and the dollar store and I paid no more than $1 each.  The Epoxy was just under $4 so for just over $10, I have awesome decor for our newly decorated space! 

All photos taken by Kristen (blog author) unless otherwise stated. Do not copy/save or print without permission. Thank you!

Tuesday, June 14, 2011

Pregnancy...the Second Time Around.

It seems so long ago since I was pregnant with my first baby, although it was just a little over 2 years ago.  Things are so much different this time around.  I'm already a mommy.  I've "been there done that" as far as pregnancy and delivery goes.  Strangely, all that doesn't prevent nervous feelings, questions and worries from entering my mind just like they did the first time I was pregnant.  Some are different worries, like how will I love another child like I love my firstborn?  and some are the same worries and concerns I had with my first pregnancy like what if something goes wrong? 
I'm pretty much what you would call a "worry wart" and have also been known to have some hypochondriac tendencies.  Example:  Years ago, I had a dull, recurring pain in my side and I convinced myself if was cancer (go ahead, laugh it up...)  Even with my first pregnancy, I experienced ligament pain early on and was sure I had an ectopic pregnancy.  Obviously I didn't since I have a beautiful 2 year old boy but that's just an example of how I can let my thoughts run wild and play tricks on me.  I am really trying to be better this time and not read, research and worry so much. 
But besides the fears about the health of my baby and the pregnancy, I think about how a new baby will change our family.  I don't want Hayden to feel left out.  I want him to feel just as special and loved.  He has been the center of our world for two years and soon he will be sharing us with a sibling.  And then there's the new baby...  It's so hard for me to imagine loving another child like I love Hayden.  I know it will happen naturally just like it did with Hayden, but it's still something I worry about.   
And there is of course the question boy or girl?  I can honestly say, I will be perfectly happy with either one!  I would love another boy and I would love a little girl.  Whichever God chooses to bless our family with is fine with me!  I already can't wait to find out.  The suspense is killing me as it did with Hayden.  It seemed like an eternity till we were able to find out the sex when I was pregnant with him.  I'll be honest, I don't know how people who choose not to find out the sex do it, I'm just not that patient! 
This new pregnancy brings lots of questions and uncertainties but also the hope of new life.  New life that will bring untold joy and happiness to our family.  I'm excited for us to take this journey together, the second time around. :)


All photos taken by Kristen (blog author) unless otherwise stated. Do not copy/save or print without permission. Thank you!